How to Make Gnocchi
|
|
Time to read 4 min
|
|
Time to read 4 min
If you’re new to making pasta, gnocchi is a great shape to start with. These little potato dumplings require very little special equipment and you likely already have all the ingredients on hand.
Still, there are a few important steps to keep in mind in order to achieve that light, fluffy texture.
Of all the fresh pasta shapes, gnocchi belong in a unique category of their own. Unlike traditional semolina dough or fresh egg pasta dough, the process for making gnocchi doesn’t require any resting and you knead the dough a lot less than you would for traditional fresh pasta dough.
Be gentle and listen to what the gnocchi dough is telling you. Even though we’re sharing with you rough estimates for ingredient quantities, you’ll likely have to adjust these quantities. At the end of the day, the best thing you can do is pay attention to how the dough feels and add more or less flour based on that.
Trust your instinct, be patient, and practice!
The word gnocchi (pronounces nyow·kee) is thought to come from nocca, which means knuckles. Another possible origin is from the Lombard term knohha, which means knot (such as wood knot) or walnut.
The potato gnocchi we know today are actually quite different from the original gnocchi, which were irregular shaped dumplings made by mixing together flour and water. Sometimes other ingredients, like leftover bread, cheese, and herbs, were mixed in, too. In fact, gnocchi are thought to be ancestor of all pasta.
Nowadays there is a tradition called “Gnocchi Thursdays,” especially popular throughout Rome. It’s thought that this tradition was born out of the Catholic practice of eating only fish on Fridays during Lent. Gnocchi provided a filling and substantial meal the night before eating fish and vegetables. The tradition stuck and today trattorias throughout the city serve gnocchi dishes every Thursday.

90 minutes
0 minutes
4
4 Russet potatoes*
1½ cups all-purpose flour, sifted, plus a little extra for sprinkling
2 egg yolks
A pinch of salt
*Russet potatoes are drier and mealier in texture, while other varieties like Yukon or say, a Sweet potato, are very dense and wet, making it harder to achieve that light and fluffy texture.
Place the potatoes, whole and unpeeled, in a large pot of water. Boil them for about 30 minutes, or just until soft enough to prick with a fork.
Note: You can also steam your potatoes, which will reduce the amount of water they absorb in the cooking process. This helps give your gnocchi a light and airy texture.
After the potatoes have cooled enough to touch, begin peeling them. Press each one through the potato ricer, letting the riced potatoes fall into a medium-sized bowl. If you don’t have a potato ricer, you can also use a fine-grater attachment on a food processor for the same effect (just be careful that you’re using the attachment and not the blade used for blending).
Let the riced potatoes dry out for 30 minutes to an hour.
Add the egg yolk into the potato mixture and gently mix with a fork. Avoid mashing the potatoes.
Prepare a large, clean surface, preferably a wooden pastry board, by sprinkling a bit of flour on top. Pour the potato-egg mixture onto the floured surface. Sprinkle in half of the flour and gently fold it in. Imagine you are folding a blanket or a towel. Fold over one side, press down gently, then turn the dough 90 degrees and fold again. Add more flour, about 1/4 cup at a time, and continue folding the dough until it forms one cohesive mass and no longer sticks to your hands. It should be smooth, soft, and supple.
It’s important to not over-knead the dough. Just knead until the flour is fully incorporated and you have a soft, pillowy mass of dough.
Pinch off an egg-size piece of dough. Using the palm of your hands, roll it out into a rope, about ¾ inch round in diameter.
Using a knife or a pastry scraper, cut the rope into small cubes, about ¾ inch in size all the way around.
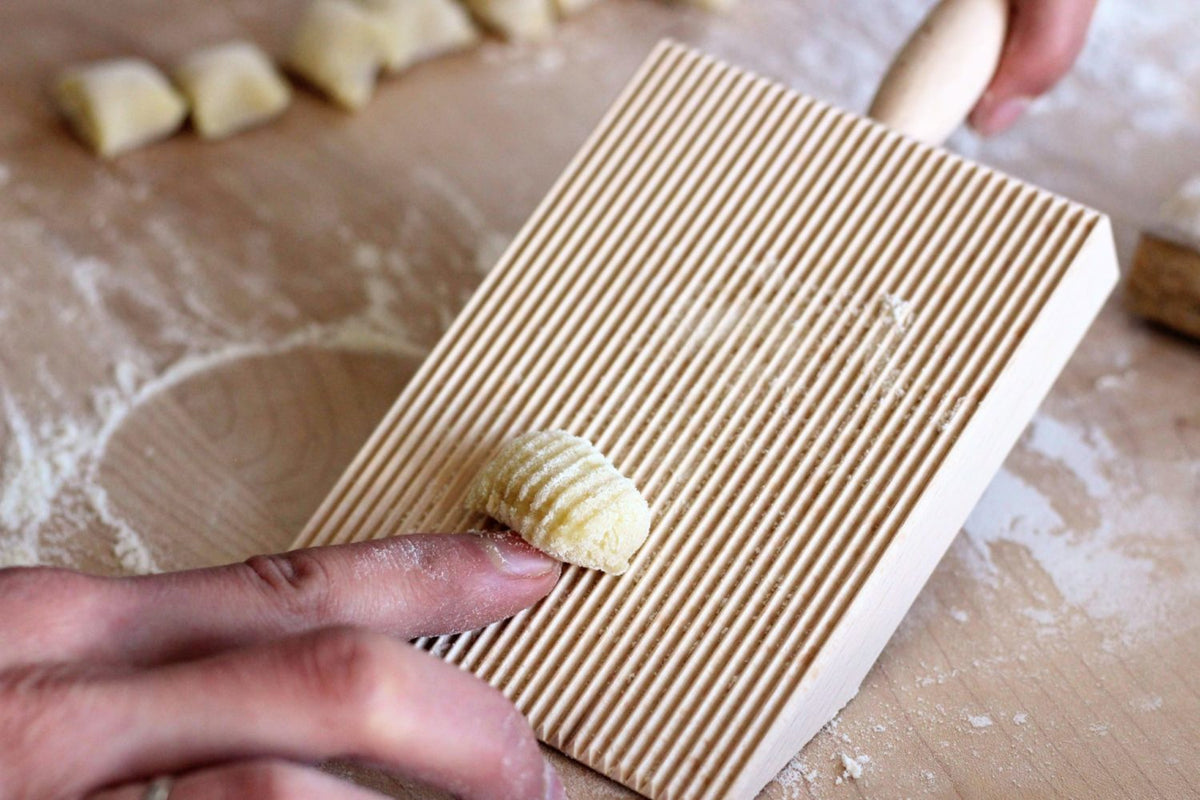
You could stop here, but if you want to make little grooves or textured gnocchi (which I highly recommend because it helps capture the sauce!), you roll the gnocchi over the back of a fork, cheese grater, or gnocchi board .
Simply use your index finger to roll one side of the gnocchi over your preferred texture tool. One side of the gnocchi will have an indent from your finger while the other will have little grooves from the fork, grater, or gnocchi board.
Place each gnocchi on a floured tray and cover with a kitchen towel. They can sit out for about 2-3 hours.
You can cook them right away or save them for later.
Bring a large pot of cold water to a boil. Add plenty of salt. Gently place the gnocchi in the water and cook until al dente, about 3-4 minutes. The gnocchi will rise to the surface when they are done. Use a slotted spoon to remove them, and add them directly to your sauce.
Gnocchi will keep in the fridge for 1-2 days. Spread them out on a baking sheet with plenty of flour and cover in plastic wrap before placing in the fridge.
Gnocchi will keep well in the freezer. Place them on a cookie sheet with parchment paper and put the whole sheet into the freezer, uncovered. Once they are firm (about 20 minutes), you can transfer them to a plastic bag. To cook, simply add the frozen gnocchi (don’t thaw them) to a pot of boiling salted water and cook until they rise to the surface.
Buon appetito!